Create And Configure A Club
A Club is the permanent home for your community on Xfitconnect. It carries the identity, branding, participant support details, document numbering, refund defaults, and organizer setup reused across the Challenges and Events you host.
Create a separate Club when an activity belongs to a different community, brand, organizer, or employee group. This keeps participant communications, documents, access rules, and financial setup with the correct organizer.
What A Club Controls
- how participants discover and join the community;
- the public name, location, purpose, and branding;
- where participants go for support;
- the default invoice or receipt series and refund policy; and
- the organizer and payout setup required for eligible paid activities.
Set up the Club before creating its first Challenge or Event. You can update most public details later, but document series and accepted payment terms may be locked or preserved after use.
Create The Club
- Sign in and open Clubs.
- Select Create Club.
- Enter the club name, objective, and primary sport.
- Enter the country, state, and city.
- Decide whether the club is open or invitation-only.
- Complete Participant support.
- Save the club.
The club name must be unique. Name availability is checked after you leave the field.
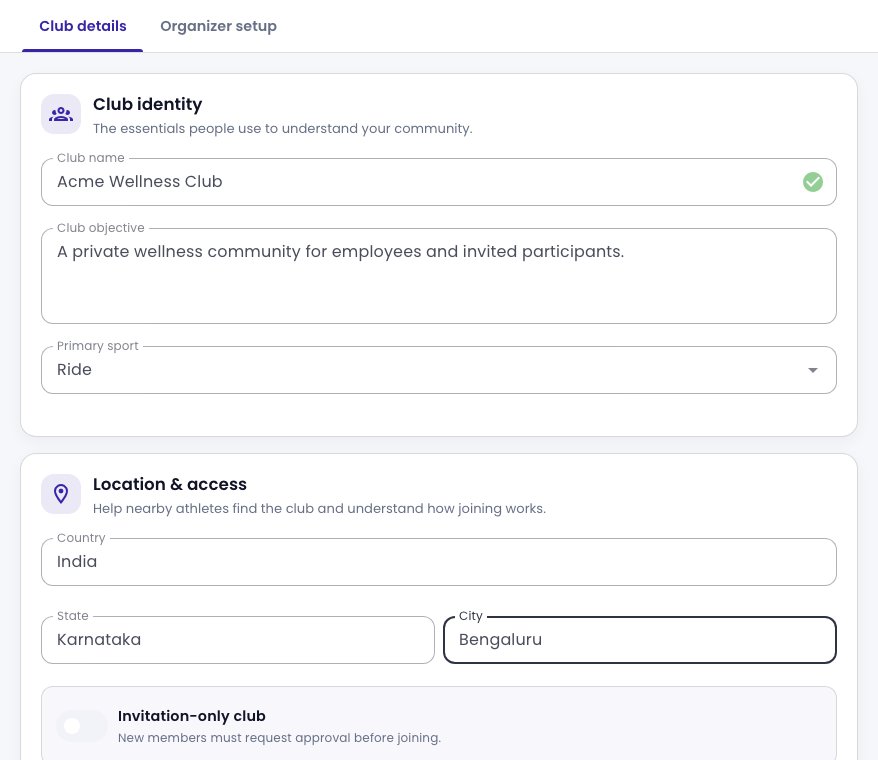
Choose Club Access
An open club can be discovered and joined using the ordinary club flow. In an Invitation-only club, a new member must request approval before joining.
Corporate email domains and employee access rules are configured separately by Xfitconnect. Contact support if the club should admit only employees using approved work-email domains.
Add Participant Support Details
Every club must give participants a clear way to contact the organizer. Provide:
- the organizer or support name participants will recognize;
- a monitored support email; and
- at least one participant-visible contact route, such as a phone number, WhatsApp or Telegram community, or public support page.
These defaults are reused on challenge and event pages and in participant communications. Do not put a private billing contact in a participant-visible field unless it is also intended for support.
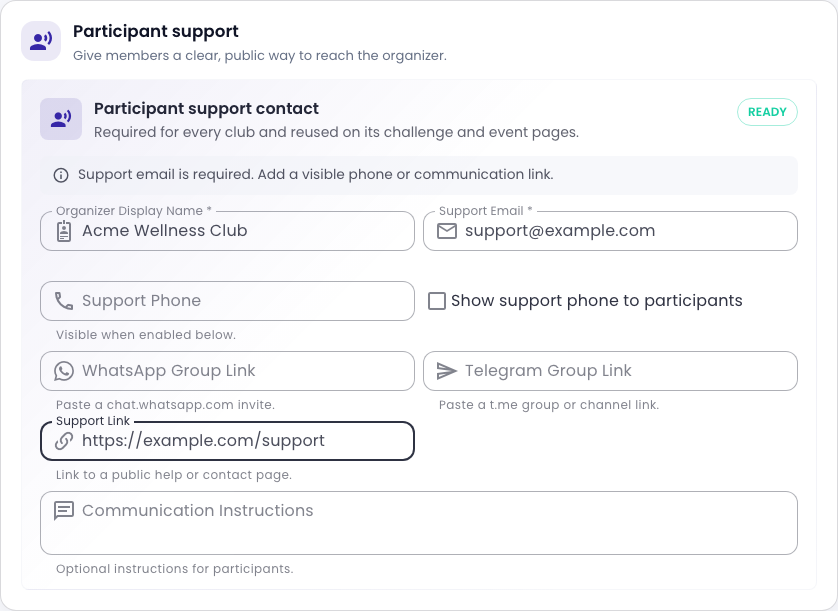
Set Document And Refund Defaults
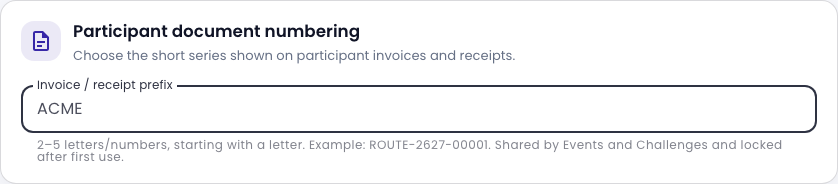
Choose the short prefix used for participant invoices and receipts. Keep it recognizable and confirm it before issuing the first numbered document, because a series may become locked after use.
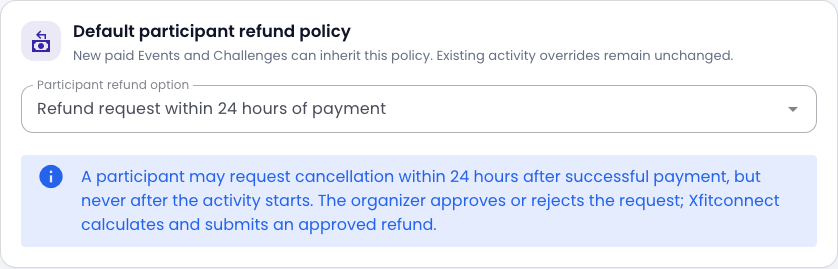
The club’s default participant refund policy is offered when you create a paid challenge or event. An activity may use an allowed override. Existing payments always retain the terms accepted when they were created.
Add Branding
After the first save, reopen the club to add:
- a banner;
- a square club logo; and
- a longer formatted description, if required.
Use images you own or are permitted to publish. Avoid banners containing private participant data.
Organizer Setup
The Organizer setup tab becomes available after the club is saved. Free activities do not require full Organizer Verification. Standard Checkout and other eligible paid features remain unavailable until the required organizer and payout checks are complete.
Continue with Organizer Quick Start or Complete Organizer Verification.